What you’ll learn:
How to extract DNA from any living thing (we will do pumpkin for Thanksgiving, but strawberry, banana, and other soft fruits are also popular).
Key takeaways:
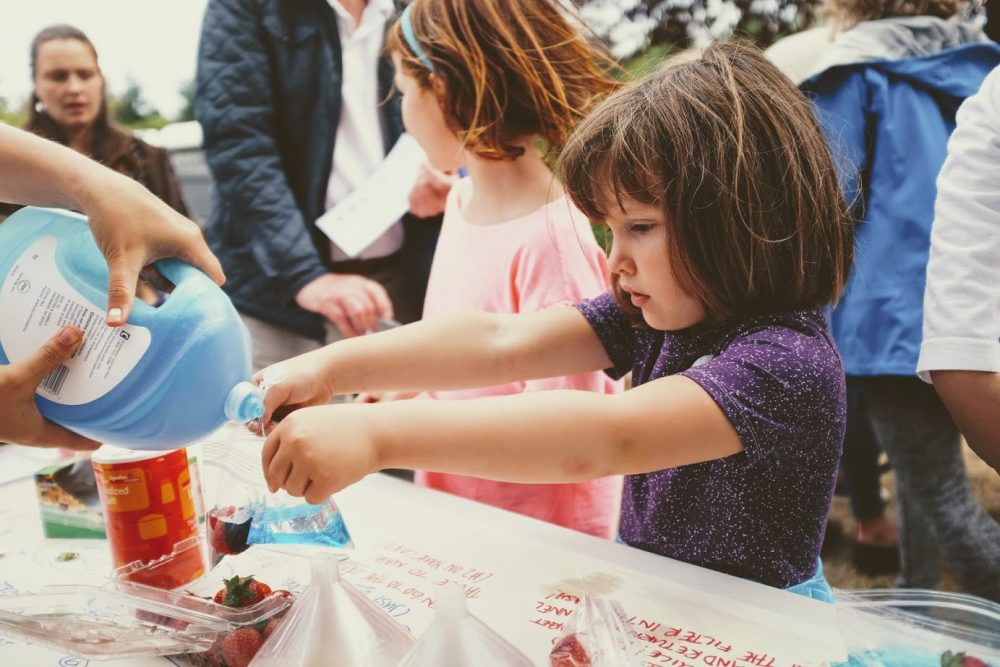
DNA extraction and isolation is a fun science project for kids to do at home as they learn about what makes us, us.
 This DNA extraction experiment can be used on anything living.
You could even extract your own DNA if you wanted to. I suggest starting with an easy mashable fruit, like strawberries, bananas, or canned pumpkin to learn the DNA extraction process. Once you have learned how to extract DNA and isolate it you can move on to other items with DNA, like your cheek cells. I have found online that strawberry DNA is very popular for extraction. In life, however, I have found bananas and pumpkin puree to yield the most DNA. I think this is because of the ease of smashing a banana or pumpkin puree.
DNA for kids
Anytime I do a DNA extraction project with kids I like to talk about what DNA is. When working with young children I talk about how DNA is like a storybook that tells your body how to be your body. DNA tells your eyes to be blue, or green, or brown. It tells your hair to be curly or straight. DNA tells your skin to be dark or light. It is what allows your cells to develop, the instruction manual for your beating heart, or your churning stomach.
I also love to insert a few cool DNA facts. For example, many kids know we are more than 98% monkey, but how similar to a pumpkin (or a banana, or strawberry) are we? We are 60% the same as any fruit or vegetable out there. Why talking about this cool fact I always hold up whatever we will be extracting the DNA from. This brings it home and is always shocking.
 How are we 60% pumpkin?
Pumpkins, bananas, strawberries, monkeys, anything living, has a baseline of similarity. That is because we all diverged from a single cell organism nearly 4.5 billion years ago. DNA is our instruction book, and it turns out that the instructions for life have a lot of similarities. A baseline of about 60% similar to be more precise. These portions of DNA that we share with pumpkins, strawberries, and bananas code for cell processes. How will cells divide? What tells the cells to die? In what way will they arrange their organelles? When we look at the big picture, we do in fact share a lot with a pumpkin.
DNA extraction must be hard, right?
Nope. It turns out, DNA extraction is pretty easy, and you likely already have everything you need sitting in your kitchen and bathroom right now. Below is a list of ingredients you’ll need to get started. Read on to learn this easy (and fun!) mashing, mixing, kid-friendly science project.
Project Ingredients:Dish soapSaltRubbing alcoholZiplock bagsCanned pumpkinToothpicksSample tubes
How to extract DNA from anything living
Yes, this how to DNA extraction experiment can be used on anything living – today, we’re going to extract DNA from a pumpkin, because it feels festively Thanksgiving-ish if we do.
Here are the basic steps for DNA extraction. Read below to learn the use of each step and ingredient in the process.
- Put your rubbing alcohol in the freezer
- Add water, salt, soap, and pumpkin puree to your ziplock bag
- Mix and mash it together
- Strain your mix into a thin, tall cup
- Slowly add the chilled alcohol to the cup and wait
- Use a toothpick to extract the white stringy DNA from the layer of alcohol and store in a sample tube
1. Put the rubbing alcohol in the freezer
Chilling your entire DNA experiment helps protect your DNA from damage. By putting the rubbing alcohol in the freezer to chill it, however, you are also helping the DNA precipitate faster into the alcohol (in the last step), and helping the two layers of water and alcohol stay separated.


2. Add water, soap, salt, and pumpkin to your ziplock bag.
You might be wondering why you need this specific mix of items. To kids, this is a fun potion making activity. It is especially perfect for little hands because the proportions of these items are not too important. You need about 1/4 cup water, and tablespoon or two of soap, and a tablespoon or two of salt. But again, the proportions are not vital. You can get extracted DNA from a mix that has widely varying amounts.
The water in this serves as a medium for mixing. In addition, later it will prove important in separating the DNA from all of the other gunk.
The salt serves as a winter coat for the DNA. DNA is naturally very charged. Imagine walking around with your wool socks and getting shocked at every door you try to open. That would be DNA floating through our solution. Salt naturally dissolves into two ions in water, Na+, and Cl-. These charges can surround the DNA like a protective jacket.
The soap is our cellular scissors. It would take a long time and some very small scissors if we wanted to break the cell walls of all those cells in the ziplock bag. We have to cut, or lyse, the cells open to get to the DNA which resides inside. Our cells have what we call a lipid bilayer, this is a system of fatty lipids that keep the cell guts inside. The lipid bilayer is made up of fats that have a water-loving head, and two water hating legs. The layer forms with two sets of fats forming rings such that the heads face into the cell and out of the cell and the legs are all in the middle as a barrier.
The soap is also a lipid with a water-loving head and two water hating legs. When soap is introduced it attracts some of the lipids in the cell membrane and pulls them into a new ring. By leaving the cell to make a new ring, the cell membrane is ruptured and the guts (and DNA) and go out.
3. Mix and mash your bag
Mixing and mashing is an important step. For pumpkin puree it is mostly an issue of mixxing, but for banana or strawberry DNA you will need to mash the fruit up really well. This helps get the soap into more cells, bursting their DNA out into the general solution.
4. Strain your mix into a tall thin cup
We want to remove any large chunks from our solution, which is why we want to put it through a mesh sieve, cheesecloth, or even coffee filter. I have found, however, that the small metal sieves work best for this.
You want to strain it into a tall thin cup so when the alcohol is added you don’t need as much to create a thick layer.

5. Slowly add the chilled alcohol and wait
This step is where the magic happens. Adding chilled alcohol will cause the DNA to precipitate out of the solution you made earlier. Imagine it like raining DNA, but instead of the DNA going down, it actually goes up into the alcohol.
What is the purpose of alcohol in DNA extraction?
Remember the salt we added earlier? Those positively charged sodium ions (Na+) created a nice jacket around the DNA. However, there was also negatively charged chloride ions (Cl-) in the solution as well. In water, the Na+ and Cl- can’t really interact. Because of this, the Na+ creates a nice jacket around the DNA neutralizing the charge and allowing it to be in the water. Now that we have the DNA in water, how do we separate it out from all the other cell guts?
Alcohol can’t keep the salt ions away from each other very well. Certainly not as well as water can. So as the alcohol goes through the mixture you made it strips the Na+ ions from the outside of the DNA and allows it to hang out with the Cl- again. That means the DNA lost its lovely jacket that insulates the charge, and suddenly, because it lost its jacket, it hates being in the water. This is convenient because the alcohol is fairly hydrophobic. Thus the DNA goes into the alcohol and leaves everything else behind (because everything else is happy being in the water).
Now you have alcohol on the top layer with a whole bunch of snot looking white strings solidifying in it. Voila. DNA!
6. Use a toothpick to get your DNA out of alcohol and into a sample cup
Now that your DNA has precipitated out into the alcohol you can ‘go fishing’ for it with a toothpick. Careful! DNA can be a bit tricky and somehow both slippery and sticky at the same time. If you drop your DNA back into the alcohol carefully try again. If you mix it all up, however, you’ll have to start over.
You can extract DNA from a variety of living things and compare them to each other. Does strawberry DNA look like pumpkin DNA?
Want to extract your own DNA? Grab some Gatorade, swish it in your mouth for about 2 minutes, and spit it into the ziplock along with the soap and salt. This is a great next step for anyone who was successful in their first DNA extraction!


 This DNA extraction experiment can be used on anything living.
  How are we 60% pumpkin?
1 thought on “Pumpkin DNA Extraction”
Comments are closed.