
 If you are anything like me, you have a ton of toys sitting around the house not getting nearly enough use. We’re big Lego builders over here, but a couple of years ago my mother in law got us a big box of Magic Tracks from a garage sale. My kids loved playing with it, and just the other day I got to thinking:
I wonder if we could do some fun science with our Magic Tracks!
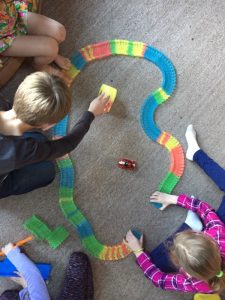
And of course, once I get on a tangent like that it takes over my whole brain. Below are some fun science activities you can do with your Magic Tracks! You might be wondering:
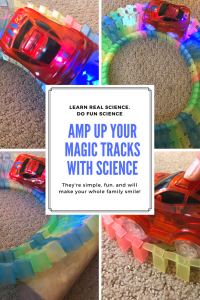
What are Magic Tracks?
Magic Tracks are a plastic car and road building toy. The tracks are thin and wide and can be connected together to form a long roadway. The tracks have small walls along the edges that guide the battery powered cars around. The tracks fit together by snapping in the middle, which allows them to pivot, making it easy for kids to bend roads into circles, or wind them up hills.
Invalid shortcode parameters
5 Physics experiments you can do with Magic Tracks
- Calculate velocity on a linear track.
- Compare the speed of the car on a flat circle versus an inclined circle.
- Investigate the effect of gravity on the speed of the car.
- Find out how fast it would need to go to truly do the loop.
- Look at how far it can jump and learn projectile motion.
5 Engineering projects you can do with Magic Tracks
- Build and measure the largest hill your car can conquer.
- Engineer a jump that will allow you to go the farthest.
- Make a floating bridge across your kitchen sink.
- Engineer the fastest route between two points.
- Build a bridge to span from your couch to your coffee table.
Let’s take an in-depth look at these physics and engineering projects you can do with Magic Tracks.
5 Physics things you can do with Magic Tracks.
1. Calculate velocity on a linear track.
 If you are working on basic physics or starting division in your math units this is a fun way to incorporate Magic Tracks toys into your curriculum. Velocity is distance/time plus a direction – if you don’t specify a direction like North, South, West, East it is just a speed.
Kids will need to build a track and measure the distance with a measuring tape. Then they will time how long it takes for the car to cover that distance. You can enhance this project by having them record three or four times, and then take the average of those times. This brings up the ability to talk about what averages are, and look at why the times might not always be the same.
Now, the car travels at a constant speed, so you can have them build longer or shorter tracks. Measure them and record times for how long the car takes to travel on each track, then have them calculate the speed by dividing the distance with the time. They should find that the speeds are all very close to each other!
If you want to go even further with this you could ask them to build a new Magic Track and guess how long it will take the car to go from start to finish! This is a little bit of algebra since Speed=Distance/Time then Time=Distance/Speed! You can even have them guess how far the Magic Tracks car will go in 10 seconds, and build a track that will match that time.
There are so many ways to change a little thing here or there on this activity that you might find yourself using Magic Tracks in math all week or even month!
On a side note: It is always good practice to use units, so if they measure in inches and seconds their units would be inches per second or in/s. This will help them later when units are shifting in word problems since they will be used to tracking units!
2. Compare the speed of the car on a flat circle versus an inclined circle.

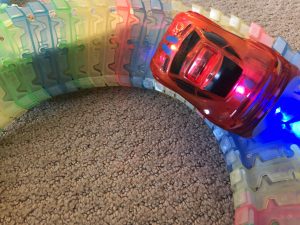 Cars can go through turns faster when they are on an incline. This is because it requires less friction, and less friction means a faster car. This is why highway on ramps and off ramps are almost always curved on an incline, this is called a banked turn. While the math and physics of calculating the fastest speeds you can go through a corner based on the angle of incline are at a high school level, measuring the effect is not.
For this project have your kids build two circles with the same number of Magic Tracks. The only difference between the two is that one of the circles will lie flat on the ground while the other circle will be at an angle (or banked).
Since you used the same number of Magic Tracks to make the circles you will know the distance the car travels on both is the same, even if it looks like on circular track is larger than the other.
Set two cars in motion at the same time, one on the flat circle and the other on the banked circle and watch them go. Record how long it takes for each car to make some arbitrary number of revolutions, or full circles (say 10). Then compare the two, are they the same or different?
3. Investigate the effect of gravity on the speed of the car.
 Gravity is a force that always pulls us to the center of the Earth. If we are in a derby car on the top of a hill, gravity is the force that pulls us down and speeds us up. If we are in a derby car trying to race up a hill, gravity is the force that slows us down.
In this activity, your kids will use Magic Tracks to build a large hill. Have them guess what will happen when the car tries to go up the hill. What about when the Magic Tracks car summits the hill and starts going down the other side?
They can record measurements of the time it takes to go up the hill, and the time it takes to go down the hill. You can even record the time it takes to travel that distance on a flat table. Then ask them to compare the two (or three) and think about what is happening. What would happen if you did this project on the moon where gravity is much smaller? What would happen on Jupiter where the gravity is much larger?
4. Find out how fast it would need to go to truly do the loop.
Magic Tracks has a set that lets the car do a loop-de-loop. If you look closely their loop has an extra set of tracks that hold the car on the loop. This is because the speed of the car going into the loop is not actually fast enough to complete the loop. If there were not the extra guide rails on the Magic Tracks loop the car would fall off the track part way.
You can take on this project in a couple of different ways. First, you can just experiment with a ball. How fast does a ball need to go to be able to travel through the loop without falling off when it is upside down?
Second, you can take a look at energy. At the top of the loop, the car is moving and also higher up than before. Thus the car has potential and kinetic energy. At the bottom of the loop, the car only has kinetic energy, the energy of the motion of the car. To calculate the minimum speed of the car at the top of the loop you have to do a bit of algebra mixed with physics equations. At the top, if the car is just about to fall off the track, then the only force acting upon it is gravity. We can use Newton’s second law F=ma, or F=mv^2/r for things traveling in a circle to find out that mg(the force of gravity)=mv^2/r, or the minimum velocity at the top of the loop is the square root of (g/r).
Knowing the speed at the top of the loop can help us find the speed at the bottom of the loop since energy is conserved, so the initial kinetic energy equals the final kinetic and potential energies, or1/2mv(initial)^2=mg(2r)+1/2m(g/r)
This math might be too complicated for your kids, which is why I suggest using a ball and rolling it faster and faster until they are able to make it complete the loop on its own. You can always save the extra math and physics for high school, but at least they will have a foundation for thinking about this type of problem!
5. Look at how far it can jump and learn projectile motion
This is a fun one and also tied to one of our Magic Tracks engineering challenges. Here, kids will build a jump and watch their car fly. You can, once again, use a rolling ball to see the effect of a faster or slower projectile on the same jump.
Encourage kids to build different types of ramps and see how the shape, size, height etc of a ramp changes how far their car will fly!
5 Engineering things you can do with Magic Tracks
1. Build and measure the largest hill your car can conquer.
 The Magic Tracks cars can only go a certain speed. This speed limits how steep of a hill they can climb. Even our cars have this limitation, which is why we grade our roads to make sure cars can safely travel up and down them. Even just a 15% grade warrants street warnings for cars and drivers.
What is the grade? The grade is basically the slope of the road, and you can calculate the grade of the hills you make by measuring the rise of the hill and dividing it by the run of the hill. for a 15% grade the road would rise 15 feet for every 100 feet forward the car travels. The steepest roads in the world clock in at about a 35% grade, but you won’t likely be seeing that with your Magic Tracks!
The engineering will come into play in how to support their hill, and math can come in if you decide to calculate the grade at the end.
2. Engineer a jump that will allow you to go the farthest.
There are a lot of things that can affect how far a car will travel in a jump. Let your kids think outside of the box in this (and all) of our engineering challenges, especially our Magic Tracks challenges.
How can they engineer the jump so that the car leaves going faster? How can they engineer the jump so that it is able to get enough height? Is there an optimal angle for the car to jump off of (there is)? Does the car go farther if it jumps off of the kitchen table instead of the floor?
There is a ton of fun here, and figuring out where to place their Magic Tracks jump, how to brace it, and how to use their tests to improve it is a great lesson in engineering and design.
3. Make a floating bridge across your kitchen sink.
Do Magic Tracks float? No. No, they do not, which is why it is an engineering challenge to make a floating bridge across your kitchen sink. Kids will need to think about what supplies they will need, what they will build the bridge on to make it float, and how to stabilize the floating to Magic Tracks cars can safely cross the river of dishes.
4. Engineer the fastest route between two points.
Set out two points in the room and challenge your kids to build the fastest Magic Tracks route to get from point A to point B. You can make this as easy or hard as you want to in the way you choose the two points. A straight line will be fastest f there are no obstacles, but how will they choose to engineer the fastest route when there are obstacles?
5. Build a bridge to span from your couch to your coffee table.
Similar to the floating bridge engineering challenge, but this one is now geared towards figuring out how to build a suspension bridge that has a roadway of Magic Tracks!


3 thoughts on “Magic Tracks: Using Magic Tracks to amp up Science and Engineering”
Comments are closed.