What you’ll learn:
How to preserve an animal track found in the wild to take home.
Key takeaways:
Scientists use many tools to study nature. Sometimes scientists want to bring specimens back with them to study further and use these tools to do that.
Animal tracking is a great unit of study that helps kids learn about form and function in biology. It’s also a lot of fun because once you start seeing and identifying animal tracks, you will soon see them everywhere! While this project is very much a pour and wait project it doesn’t have to be – below we have some ideas on how to expand the conversation around what animal track you find.
Project Ingredients:

- Casting compound (or Plaster of Paris)
- 2L bottle plastic strips
- Animal track molds (for teachers who can’t get out into nature)
- Measuring bottles
- Mixing bowl
- Stirring sticks
How to make a plaster mold of animal tracks
- Find an animal track and surround it with a plastic wall
- Mix plaster molding agent
- Pour plaster molding agent and wait ~30 minutes
- Remove animal track cast and take home
This is a fun and easy project you can do at home, or on the road. The best part is you’ll get to keep your animal track casts and can create a collection, paint them, or use them in larger art projects.
1. Find an animal track

It is pretty hard to take an animal track cast if you don’t have an animal track in the first place. You can find animal tracks all over – at the beach, in mud puddles, in the forest. It is easiest if you plan an excursion for this so that you aren’t searching for animal tracks right on the beaten path.
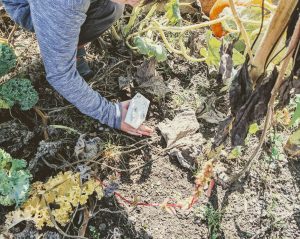
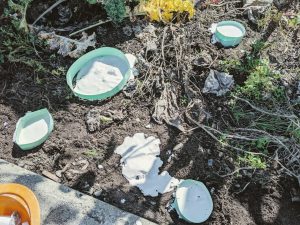
Once you have found the animal track you want to make a mold of you should create a perimeter wall around it using the 2L plastic strips. This will keep the plaster from pouring everywhere and leave you with a nice mold.
2. Mix your plaster

Plaster of Paris and many (maybe all) plaster casting products are not dried through the air, but instead, harden through a chemical process. This means that you can’t mix a big batch of plaster and store it in an air-tight bottle before departing on your hike. If you do, you’ll find a rock solid bottle when you pull it out to take your first mold.
Read the instructions on your particular plaster to mix it in the right proportions. It is often 1:2 or 1:3 by volume, which is why the measuring bottles come in handy. You can keep the dry plaster and water separate until necessary and still easily make the right mixture.

3. Pour your plaster over the animal track
Once you have your animal track found and you have your plaster mixed you will want to pour it into the volume you created with the 2L plastic strips. Pour slowly at first so as to not disturb your animal track. Leave your animal track for about 30 minutes to harden. If you are with a class of students this is a great time for them to venture out and try to discover animal signs in the area around them.
4. Remove your DIY animal track mold and classify
After the plaster has hardened you can carefully remove the animal track mold. It is likely that you will also remove some dirt/bark/sand/etc in this process. You can gently brush off your mold if desired.
Once you have your animal track mold you can take it home! This is a great time to classify the animal track and think about why that animal has that particular type of track!
Differentiated learning ideas with DIY Animal Track Mold and Casts
Looking to expand your DIY animal track cast making to encompass more differentiated learning projects? Here are some quick ideas on how you can do that:
- What size do you think this animal is? How do the tracks help give us a ballpark of animal size?
- Does this animal have claws? How might the claws help this animal? or, Why does this animal survive without claws?
- How can we use the location of the animal track find to help us think about what type of animal might have made the track?
- Sketch the animal track and label details such as claws, pads, and hooves.
- Measure the size of the animal tracks in the ground.
- Use a series of animal tracks to determine the direction the animal was going.
- Use a local animal tracks guide to determine what animal made this track.
- Use your plaster animal track cast as a jumping point for a larger project based learning opportunity.